Veneer Shade Matching: Get It Right
By Adam Smith, Head of Patient Research
Updated 15 February 2026 · Dental tourism researcher · Clinic vetting specialist · 40+ clinics assessed on-site
Clinically reviewed by Dr. Ertan Etemoglu, Lead Dentist & Co-Founder
Tower Dental Clinic, Istanbul · 26 years in practice · 8,000+ patients/year · Turkish & American Dental Association member · Featured on Reuters
Tap a question — Pearl answers
Or ask me — I can…

Color mismatch is the most common veneer complaint in dental tourism groups. Here's how shade selection actually works, why mismatches happen, and the one test you must never skip.
You've done most of the heavy lifting on this article. The content is already quite natural and engaging, with good specifics and a conversational tone. However, there are still some AI-isms and rhythm issues to address. Here's the refined version:
A colour mismatch on one visible tooth is worse than no veneers at all. It's the first thing people notice, and it can't be fixed without removing the veneer and starting over. Yet it's the most reported cosmetic complaint in dental tourism Facebook groups across every destination — Turkey, Hungary, Spain, Poland, and Dubai.
"My veneers on one side of my mouth are a different colour to the other side"
"This happened to me too! The clinic blamed the lighting in their office"
These posts appear weekly. The problem is preventable, but you need to understand shade selection well enough to speak up during your appointment.
Your dentist excels at preparing teeth and bonding veneers. Shade matching is different. Not every clinician gives it the attention it deserves.
Why Colour Mismatches Happen
Four factors cause most shade mismatches in dental tourism settings.
1. Clinic lighting vs natural daylight. Dental rooms use bright overhead LEDs for clinical visibility, not colour accuracy. A shade that looks perfect under 6,000K LED lighting can appear completely different under natural daylight, warm restaurant lighting, or your phone camera flash.
This isn't dishonesty — it's physics. Colour perception changes with the light source.
"Did you approve them before they were permanently fitted? Always check in natural daylight"
2. Rushed try-in appointments. Busy dental tourism clinics process multiple international patients daily. The try-in appointment can feel hurried. You see the temporary veneers or wax-up models in the dental chair under clinical lighting for quick approval.
When you're tired, nervous, or just want it done, approval comes too fast. No proper daylight check.
"This is why you should never rush the try-in appointment"
3. Communication gaps across languages. Describing colour preferences is hard in your native language. Across a language barrier — even with a translator — nuances like "natural warm white" versus "bright cool white" versus "my-teeth-but-better" get lost.
Hand gestures and pointing at shade tabs help. They're not precise enough.
4. Batch inconsistency from the dental lab. Full sets of 20 veneers often come from two separate lab batches. The left side might fire on Monday, the right side on Wednesday. Even small kiln temperature differences affect the final shade.
This is a lab quality control issue. It happens everywhere.
The Shade Guide Explained: B1, BL, and Everything Between
Every dental clinic uses a standardised shade guide — usually the VITA Classical or VITA 3D-Master system. Understanding these systems puts you in control.
VITA Classical Shades (Most Common)
The VITA Classical system organises tooth shades into four families:
| Family | Shade Range | Character |
|---|---|---|
| A (reddish-brown) | A1, A2, A3, A3.5, A4 | Warm, natural. A1 is the lightest in this family. |
| B (reddish-yellow) | B1, B2, B3, B4 | Slightly warm, very popular for veneers. B1 is the most requested shade worldwide. |
| C (grey) | C1, C2, C3, C4 | Cooler undertone. Less common for veneers. |
| D (reddish-grey) | D2, D3, D4 | Warmish grey. Rarely chosen for cosmetic work. |
B1 is the standard "bright but believable" shade. Noticeably whiter than most natural teeth but doesn't scream "veneers" to anyone looking at you. Most popular choice among dental tourism patients under 50.
Bleach Shades (BL)
Beyond the standard VITA range, bleach shades exist for patients wanting teeth whiter than any natural tooth:
| Shade | Brightness Level | Common Name |
|---|---|---|
| BL1 | Whitest available | "Hollywood white" |
| BL2 | Very white | Bright but slightly less intense than BL1 |
| BL3 | White | Noticeable but not startling |
| BL4 | Light white | Closest bleach shade to natural B1 |
BL1 and BL2 are the "Love Island teeth" shades. Bright, uniform, obviously artificial. Some patients love this look. Others find it ages badly — what looks great at 30 can look jarring at 55.
Age-Appropriate Shade Selection
This is where Facebook groups get brutally honest.
"You're over 50. Choose teeth for your age, you'll look hideous with bright white"
Harsh? Yes. Wrong? Not entirely.
Teeth naturally darken with age. A 55-year-old with BL1 veneers has teeth that look disconnected from their face — the skin tone, lip colour, and facial structure all signal a certain age while the teeth signal 25. The contrast draws attention for the wrong reasons.
"I'm 54 went B1"
B1 at 54 works. Clearly improved from natural ageing without looking artificial. This is the sweet spot for most patients over 45.
Shade Recommendations by Age and Context
| Age Range | Recommended Shades | Notes |
|---|---|---|
| 20-35 | BL2 to B1 | Can carry brighter shades naturally. Skin elasticity and collagen levels support a bright smile. |
| 35-50 | B1 to A1 | B1 remains the go-to. A1 is slightly warmer and very natural-looking. |
| 50-65 | B1 to A2 | B1 still works for many. A2 adds warmth that complements mature skin tones. Avoid BL shades. |
| 65+ | A1 to A2 | Natural warmth looks best. Even B1 can look overly bright. |
| Dark skin tones (any age) | BL3 to B1 | Higher contrast between teeth and skin makes bright teeth look more natural. Darker skin can carry whiter shades. |
| Fair/pale skin tones (any age) | B1 to A1 | Lower contrast means ultra-white shades look more artificial. Warmer shades integrate better. |
Guidelines, not rules. The right shade depends on your personal preference, your skin tone, and how much change you want. But walking into the appointment with a target range prevents impulsive choices under clinic lighting that you'll regret later.
The Non-Negotiable Daylight Test
This is the single most important thing you can do to prevent a colour disaster. Applies whether you're in Istanbul, Budapest, Warsaw, Marbella, or Dubai.
Before your veneers are permanently bonded, take the try-in veneers outside and look at them in natural daylight.
Not clinic lighting. Not the bathroom mirror. Outside. In the sun or bright overcast light. Take a photo. Take a video. FaceTime someone at home and ask what they think.
"Did you approve them before they were permanently fitted? Always check in natural daylight"
If the clinic resists this — claims it's unnecessary, says it will delay the schedule, or insists the clinical lighting is "calibrated" — red flag. Reputable clinics everywhere encourage patients to check in daylight. Takes five minutes. Prevents the most common cosmetic complaint.
What to check during the daylight test:
- Do all teeth match each other? Look specifically at the canines versus the central incisors — these are the most common mismatch points.
- Does the shade look right against your skin tone? Hold a white piece of paper next to your smile for reference.
- Are you happy with the brightness level? If it looks too white outside, it IS too white. Clinic lighting flatters everything.
- Check from multiple angles — straight on, three-quarter profile, and from below (how people see your teeth when you're talking to them).
Communicating Shade Preferences Across a Language Barrier
Bring visual references. Words are ambiguous across languages. Photos are universal.
Before your trip, prepare these:
-
Celebrity reference photos. Find 3-5 photos of smiles you like — Google "[celebrity name] smile close up." Save them. Show your dentist and say "this shade range."
-
Photos of your own teeth now. Take close-up photos in daylight, with flash, and without flash. Gives the dentist a baseline to understand how much change you want.
-
Photos of shades you do NOT want. Equally important. If you've seen someone with teeth that are too white or too grey, save that photo as a "not this" reference.
-
Write your shade preference down. If you want B1, write "B1" and show it. Point to it on the VITA shade guide in the clinic. Confirm verbally AND visually. Have the coordinator translate and confirm.
-
Use the VITA shade guide physically. Ask the dentist to hold shade tabs against your face in daylight (not just inside your mouth under overhead light). You should see the tab next to your skin, lips, and eyes to judge the overall effect.
Documentation Checklist: Protect Yourself at Every Stage
For every appointment during your trip, document this:
| Stage | What to Document | How |
|---|---|---|
| Initial consultation | Shade selected, shade guide used, your written preference | Photo of shade tab, written note signed by dentist |
| Tooth preparation | Photos of prepared teeth before impressions | Ask clinic to provide or take your own |
| Try-in (temporary veneers) | Appearance in daylight, from multiple angles | Photos and video in natural light |
| Final try-in (permanent veneers, before bonding) | Colour match in daylight, shape, fit | Photos, video, and a FaceTime call with someone at home |
| After bonding | Final result in daylight, clinic lighting, and phone flash | Full set of photos for your records |
This documentation serves two purposes: it forces you to actually evaluate each stage, and it provides evidence if you need to make a warranty claim later.
What to Do If the Colour Is Wrong After Bonding
"Unfortunately there's nothing you can do at home - they need to be redone"
"I had the same issue. Ended up getting them redone in the UK because I couldn't face going back"
If veneers are permanently bonded and the colour is wrong, there are only two options: accept it or have them redone. No adjustment. No polishing. No bleaching that will fix a shade mismatch on porcelain or zirconia veneers. (Composite can sometimes be adjusted, but results are limited.)
If you're still at the clinic: Raise the issue immediately. Don't leave the country hoping it will "look different once you get used to it." It won't. A reputable clinic will redo mismatched veneers at their cost before you fly home.
Inconvenient? Yes — may add 2-3 days to your trip. But infinitely better than dealing with it remotely.
If you're back home: Contact the clinic with your documentation photos. Reference the shade you agreed to versus what was delivered. If the clinic has a warranty covering manufacturing defects, a provable shade mismatch should qualify.
You'll likely need to return for the redo. The clinic should cover dental work — flights and hotel are usually on you.
If the clinic is unresponsive: This is where booking through a platform matters. MyDentalFly maintains the relationship between you and the clinic, and can advocate on your behalf if a warranty dispute arises. Direct bookings via Instagram or WhatsApp leave you with no intermediary and no use.
If you decide to redo locally: A UK dentist can remove and replace veneers, but expect UK prices (£700-1,000 per tooth for porcelain). For a full set, this may cost more than flying back. Do the maths first.
Prevention Beats Everything
Shade matching problems are almost entirely preventable. The patients who avoid them do three things: they bring visual references, they insist on the daylight test, and they never rush the try-in appointment.
None of this requires dental knowledge. Just assertiveness and five extra minutes.
Start your smile assessment with clinics that document shade selection as part of their standard protocol — not as an afterthought.
See also: Red Flags for Dental Clinics
Next Steps
The dental assessment maps your teeth in 2 minutes and recommends the right treatment for each one. The savings calculator shows verified clinic prices vs home costs.
We've verified every clinic on our platform. Your dental tourism consultant ensures the clinic follows the right treatment plan and manages the whole process — from patient file to deposit protection.
Guide: Veneers Turkey Guide
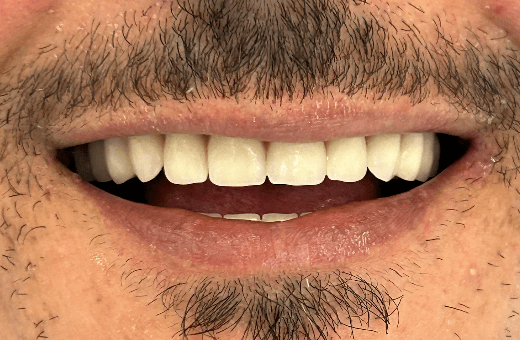
Real results from verified clinics
Drag the slider to compare before & after

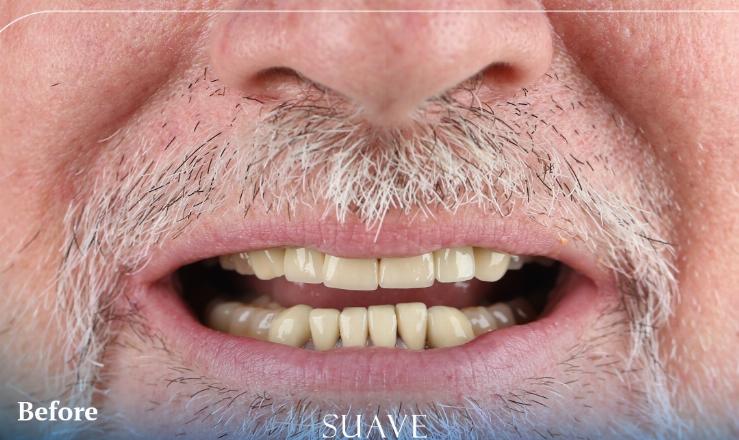
Suave Clinic
Verified clinicFull smile restoration · Istanbul
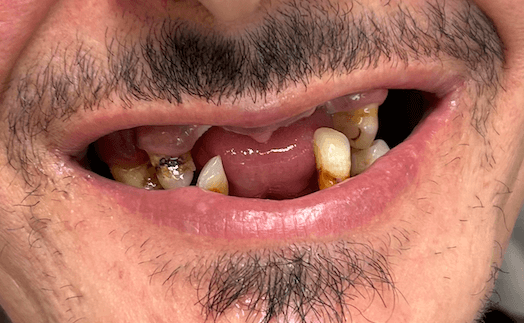
MDental Clinic
Verified clinicFull smile makeover · E-max veneers · Budapest
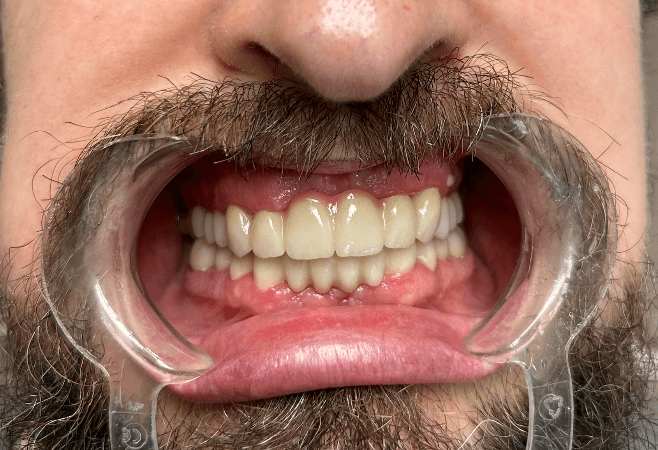
MDental Clinic
Verified clinicCrowns & restoration · Budapest
 Before → After
Tower Dental Clinic
Verified clinicHollywood smile · E-max veneers · Istanbul
References & Sources
All clinical claims, pricing data, and statistics in this article are based on peer-reviewed research, official regulatory sources, and publicly verifiable data. We invite you to verify anything before making a treatment decision.
- 1.BBC News, "Turkey teeth: The dental tourism risks patients don't see." February 2023.
- 2.BBC, "Turkey Teeth: Bargain Smiles or Big Mistake?" — documentary investigating dental tourism risks, 2022.
- 3.Euronews, "Medical tourism: Dental expert explains why Turkey teeth can be a costly mistake." October 2024.
- 4.General Dental Council (UK), "Going abroad for dental treatment" — patient guidance.
- 5.British Dental Association (BDA), "Dental tourism: Patients need to know the risks."
- 6.T.C. Saglik Bakanligi (Turkish Ministry of Health), Health Tourism Authorisation Regulations.
- 7.Kontakiotis, E.G. et al. (2015), "A prospective study of the incidence of asymptomatic pulp necrosis following crown preparation," Int. Endod. J., 48(6), 512-517.
- 8.Pjetursson, B.E. et al. (2012), "A systematic review of the survival and complication rates of implant-supported fixed dental prostheses after at least 5 years," Clin. Oral Implants Res., 23(S6), 22-38.
- 9.Sailer, I. et al. (2015), "All-ceramic or metal-ceramic tooth-supported fixed dental prostheses: a systematic review," Dent. Mater., 31(6), 603-624.
- 10.Türkiye Today, "1.5 million health tourists visited Türkiye in 2024, generating $3 billion in revenue." 2025.
Medical disclaimer: This article is for educational purposes and does not replace a clinical examination. Treatment outcomes vary between patients. Always consult a qualified dental professional.
About MyDentalFly
MyDentalFly is a UK-based platform that builds your treatment plan and matches you with vetted specialist clinics abroad — and a dentist at the clinic reviews and confirms every plan before you pay anything.
Our interactive assessment evaluates your dental needs and builds a bespoke package: every treatment explained, a matched clinic with reasons why, your named dentist, flight estimates, transport, and accommodation — all in one place. We maintain a small, vetted network across Turkey, Hungary and Poland, visit clinics in person, help arrange CBCT scans before you fly, and stay with you through the entire journey. Compare. Save. Smile.
Tap a question — Pearl answers
Prefer a person? WhatsApp us · 020 4634 2312 · or
Clinically reviewed before booking
Every dental package built on MyDentalFly is reviewed by a qualified dentist before it gets accepted. Our clinical reviewers include specialists like Dr. Hubert Trępatowski — 800+ All-on-4 procedures, trained under Professor Paulo Malo (pioneer of the All-on-4 technique), graduate of Jagiellonian University Medical Faculty, Krakow.
About the author
Adam Smith
Head of Patient Research, MyDentalFly
Adam leads patient research at MyDentalFly, personally vetting clinics across Turkey, Hungary, and Poland. He has reviewed over 200 clinic proposals, analysed patient outcomes, and helped coordinate treatment plans for patients across the UK, USA, and Europe.
Clinically reviewed by
Dr. Ertan Etemoglu
Lead Dentist & Co-Founder, Tower Dental Clinic
26 years in practice · 8,000+ patients/year · Turkish & American Dental Association member · Featured on Reuters
Content last reviewed: 14 July 2026


